
Every golfer has that one shot they almost want to look away from. For most players asking how to fix a golf slice, it is that high, weak ball that peels off to the right, dives into trees or rough, and turns a decent swing into instant trouble.
We see this pattern all the time. Around nine out of ten amateur golfers fight a slice and many try to simply aim left and live with it. A slice is not just a small quirk; it is a clear sign that the clubface and swing path are working against each other, which costs you distance, accuracy, and confidence.
The positive news: a slice has clear causes and clear fixes. When you combine:
that weak “banana ball” can turn into a strong, penetrating flight.
At Elite Golf Academies we use PGA European Tour inspired coaching, TrackMan 4 data, high-speed cameras, and 3D motion analysis to show players exactly how to fix a golf slice in a measured, practical way.
By the end of this guide you will understand why the ball slices, how driver setup and grip start the pattern, how the loop drill re-trains your path, and how your release and body sequence complete the fix.
“The fundamentals are the building blocks of fun.”
— Jack Nicklaus
A slice comes from two things at impact: an open clubface and an out‑to‑in swing path. When those combine, you get heavy sidespin, lost distance, and the classic curve right. Any plan for how to fix a golf slice must deal with both face and path.
Early steps often happen before you swing: choosing a driver with enough loft and building a stronger grip. These changes help the face square, let the hands release without tension, and make it easier to swing from the inside instead of over the top.
Lasting change comes from drills and feedback that build a new pattern: the three-part loop drill, simple path drills, a natural release, and better lower body sequencing. Backed by TrackMan data and PGA coaching at Elite Golf Academies, golfers move from guessing to a clear, data‑driven plan.
For a right‑handed golfer, a slice is a shot that starts near the target (or even left of it) and then curves hard to the right with a high, weak flight. It feels like the ball has no punch and can lose tens of yards compared to a solid, straight shot.
Two numbers at impact create that curve:
When the face is open to both the target and the swing path, the ball starts right and then curves even farther right.
Modern ball‑flight laws show:
A typical slicer swings steeply, throws the club “over the top” with the shoulders, and cuts across the ball. That over‑the‑top move adds sidespin on top of an open face, producing the big curve.
Behind that move is a chain reaction:
A hook is the opposite: the face is more closed than the path. While a big hook can be wild, many good players intentionally hit a small right‑to‑left curve. A slice, by contrast, shows that face and path are badly out of sync, which makes consistent ball striking much harder.
At Elite Golf Academies, we measure all this instead of guessing. TrackMan 4 gives exact numbers for:
We might see a path 5° left with a face 3° open, then show you how those numbers change as we adjust your grip, path, and release. This clear picture makes the next steps far more effective.
“If you can’t measure it, you can’t improve it.”
— Often attributed to Peter Drucker (and very true for golf swings)
Many players look for how to fix a golf slice by changing their swing but never question whether their driver is helping or hurting.
One common mistake: a slicer using very low loft because they believe a lower number means more distance. Often, that choice makes the slice worse.
For many slicers, 10.5–12 degrees of loft:
Modern adjustable drivers add even more help:
There is also a twist many golfers miss:
If you swing a 10.5° driver with freedom and square the face, your launch can be lower and stronger than with a 9° head you hold open. That open face adds loft at impact, so your 9° driver can behave like 11° with lots of sidespin.
At Elite Golf Academies, we fit drivers using Taylormade and PING fitting studios plus TrackMan data. We look at:
Then we match loft, shaft, and head settings to your swing. Many golfers reduce their slice and gain distance the same day simply by moving to a higher loft and a draw‑biased setup.
Once your driver is helping you rather than fighting you, the next step is your grip, the only direct contact you have with the club.
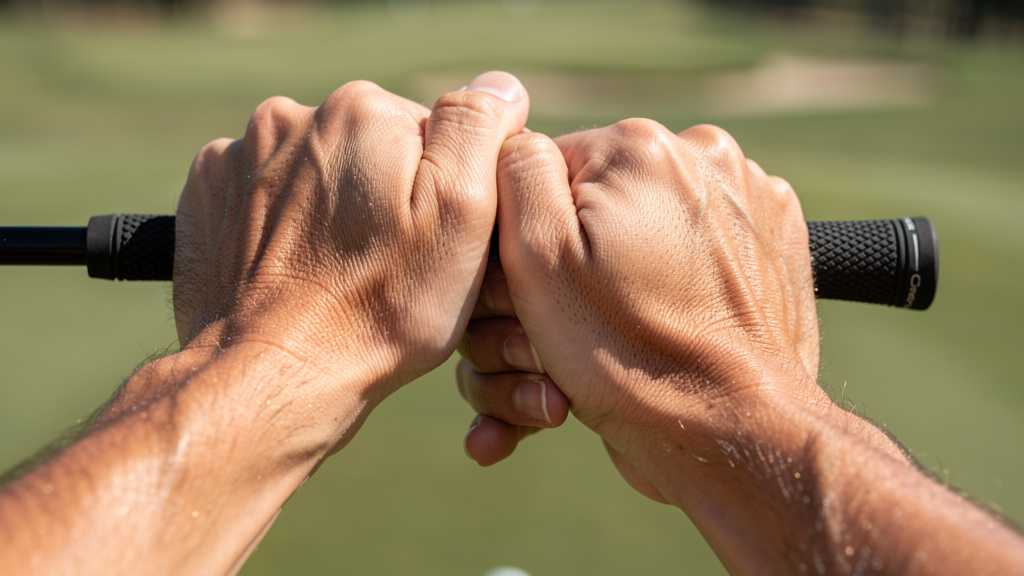
When golfers ask us how to fix a golf slice, we often start with their hands before we touch the swing. The grip controls how the clubface behaves. If the hands sit in a weak position, the face wants to stay open, no matter how hard you try to swing from the inside.
For a right‑handed player, a weak grip usually means:
This keeps the lead hand’s back facing the target and the clubface open.
To build a stronger grip:
Lead hand
Trail hand
Grip pressure
A softer hold lets the clubhead swing, helps the face rotate, and supports a natural release.
At Elite Golf Academies we often film the grip with high‑speed cameras. We check whether the hands keep that stronger position or roll back toward weak during the takeaway. Players then make slow practice swings with the new grip and light pressure, feeling the weight of the clubhead and a gentle roll of the forearms through the ball.
Once your hands support a square face, you are ready for the drill that changes the path.
Even with better equipment and grip, a slice will hang around if the club path stays out‑to‑in. Many golfers pull the club too far inside in the backswing, then throw it over the top on the way down. The loop drill we use at Elite Golf Academies teaches the opposite move and sits at the heart of how to fix a golf slice for good.
Based on a three‑part loop popularized by coach Hank Haney, the goal is to:
Practice slowly at first. Speed comes later.
From your view this is a clockwise loop. You are not trying to hit the ball yet.
As you repeat this large circle:
Do 10–15 slow loops with no ball. In our academies we often pair this with 3D motion analysis to show how different this shallower loop is from a steep, over‑the‑top move.
As you turn, feel:
From the top, swing down and let the club travel back over the ball, like the lower half of that clockwise loop.
Repeat 8–10 times, focusing on:
At Elite Golf Academies, we often track this step on TrackMan to show the swing path number moving:
Begin by hitting shots at 60–70% speed. Your goal:
You may see some shots start slightly right and curve gently left. That small draw is a clear sign the pattern is changing.
If the ball still slices, slow down more and exaggerate the feeling of the club coming from the inside. At Elite Golf Academies, we suggest:
so the new path starts to feel normal.
Different golfers react to different feels. Once you understand the loop drill, these two simple exercises give instant feedback on whether you are swinging from the inside or slipping back into an over‑the‑top pattern.
This drill uses a small obstacle to keep you off the outside path:
If you come over the top and cut across the ball, the clubhead will collide with the headcover. To miss it, the club must approach from the inside.
Start with easy swings, even without a ball. As you gain consistency:
At Elite Golf Academies, we often pair this with TrackMan so players can see the link between:
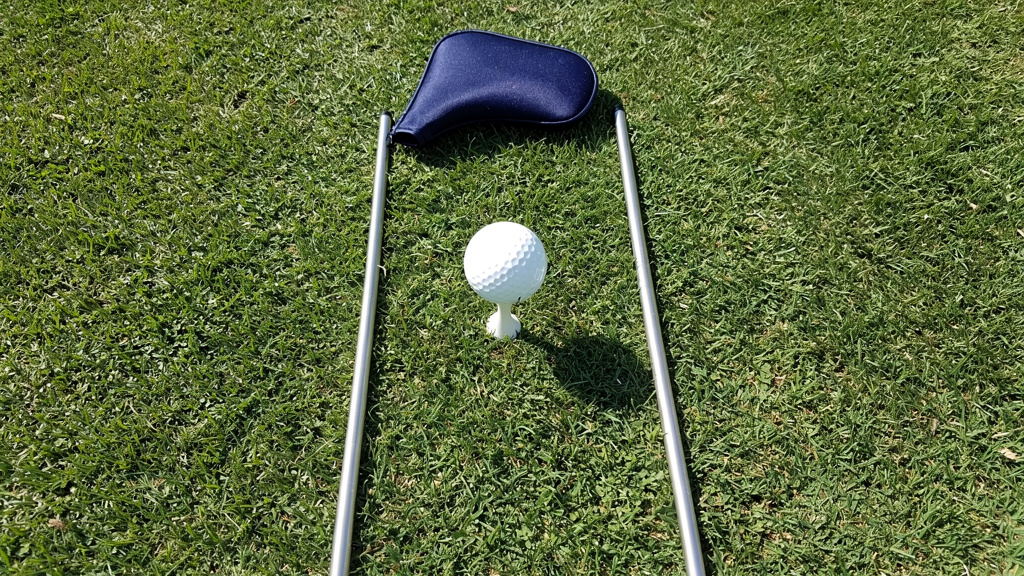
The gate drill gives you a visual and physical guide:
To succeed, the club must:
Begin with a wider gate (around 30 cm), then narrow it as your control improves. For advanced practice, we sometimes angle alignment sticks to form a three‑dimensional corridor and film the swing at Elite Golf Academies so players see how the club tracks through that space.
Changing path is a big part of how to fix a golf slice, but it is only half the job. If you swing from the inside and the clubface is still open, you will hit a push‑slice that starts right and curves more right.
The release is the natural rotation of your forearms and hands as the club swings through the bottom of the arc. With the stronger grip and lighter pressure we built earlier:
A useful image is skipping a stone across water. Your trail hand rotates so the palm faces down as you throw. In a golf swing, the trail hand and forearm move in a similar way over the lead side as the club passes through the ball.
Two simple drills make this much easier to feel.
With the hands separated:
Thin or weak shots usually mean the trail hand has stalled and the face stayed open.
Hit 15–20 balls with the split grip, focusing on the feeling, not perfect contact. Then return to your normal grip while keeping the same sense of the clubhead passing your hands.
At Elite Golf Academies, we often film this drill with high‑speed cameras to show how much more the face closes compared to a slicer’s old pattern.
The motorcycle drill sets the face in a stronger position earlier in the downswing.
As you start down:
When you reach impact with this feeling, the face will be closer to square or a touch closed. At first you may see some shots curve left; this is feedback that you have moved away from an open‑face slice pattern. You can then reduce the amount of bow until you see straight shots or a small draw.
At Elite Golf Academies, we track lead wrist movement with 3D motion systems so you can see exactly how your wrist action affects face control.

Many golfers focus only on hands when asking how to fix a golf slice. Grip and release matter, but the body also has a big role. A slice is often caused by poor sequencing, where the upper body starts the downswing first and throws the club over the top.
A reliable swing begins from the ground up:
Posture is linked to this chain. If the hips move toward the ball (early extension), your spine angle changes and the arms must adjust mid‑swing. That often pushes the club above plane and back into a slicing path.
As you finish your backswing:
This creates a stretch between hips and chest. That stretch:
If the shoulders and arms dive at the ball first, there is no space for the club to drop. It gets thrown out above plane, and the only route back to the ball is out‑to‑in.
A simple drill:
Repeat several times without a ball, then add gentle shots while keeping that sequence. At Elite Golf Academies, our 3D systems show the timing of hip, torso, and arm movement so we can fine‑tune this order for each player.
Even with better sequencing, poor posture control can wreck the path.
Many slicers:
This change in spine angle pushes the arms away from the body, steepens the club, and brings the slice back.
To fix this, focus on staying in posture:
Practice slow‑motion swings where your only goal is to keep your chest in its forward tilt and your hips “on the wall.” You can even use a real wall or chair behind you for feedback.
When you stay in posture and keep the hips back, it becomes much easier for the club to travel:

Everything covered so far gives a full plan for how to fix a golf slice on your own. Many golfers make solid progress with these ideas, especially with focused practice. But there is a big difference between guessing what is happening in your swing and seeing it measured and explained in real time.
At Elite Golf Academies, we combine technology, facilities, and PGA professional coaching to speed up this process for golfers across the UK.
“Practice puts brains in your muscles.”
— Sam Snead
Our job is to make that practice smart, focused, and specific to your swing.
We use TrackMan launch monitors to measure what the club and ball do on every swing:
Instead of guessing how to fix a slice, you might see clear numbers like:
We then show how those numbers change as you work on grip, path, and release.
We combine this with:
This feedback makes practice efficient. You know which numbers must change and can watch them shift as your swing improves.
Technology only helps if someone explains it clearly. All coaching at Elite Golf Academies is delivered by experienced PGA professionals. Our Academies Director, Steve Bainbridge, brings years of PGA European Tour experience, so the same principles used with tour players are available to every golfer we coach.
We design coaching plans that:
Many players find that this structure and accountability keep them progressing even when old habits feel easier.
You now have a clear picture of why the ball slices and what to do about it. A slice is not bad luck; it is the result of:
The full answer to how to fix a golf slice brings several pieces together:
With three focused practice sessions per week, many golfers see real change within 2–4 weeks, and deeper, long‑term improvement over 6–12 weeks. As the slice fades, drives fly farther, more approach shots hold the green, and golf becomes far more enjoyable.
You can work through these steps on your own using this guide. If you want to speed things up and remove guesswork, our team at Elite Golf Academies is ready to help with TrackMan, 3D motion analysis, custom fitting, and PGA professional coaching. We have already supported many golfers through this same shift from slicer to confident ball striker.
Most golfers who follow a clear plan for how to fix a golf slice notice change within 2–4 weeks. Progress depends on:
Working on drills like the loop drill and split‑hand drill three times per week usually brings early straight shots or small draws. To make the new pattern feel natural under pressure often takes 6–12 weeks of steady work. With coaching at Elite Golf Academies and data showing what is changing, this time frame can shorten because mistakes are corrected quickly.
Yes. Driver settings can have a big impact, especially in the short term. Increasing loft and using a draw‑biased setting:
However, equipment changes alone cannot fix a weak grip or over‑the‑top swing. Think of them as a helping hand, not a magic fix. For many slicers, a driver with 10.5–12 degrees of loft and weight moved toward the heel is a strong starting point. At Elite Golf Academies, we use launch monitors to match loft, shaft, and head settings to your swing so club changes and swing changes work together.
Grip, path, and clubface all affect each other, which is why a full plan for how to fix a golf slice touches all three:
In ball‑flight laws, the face angle has the biggest say in starting direction, while the path creates the curve. At Elite Golf Academies, we use data to see which element hurts you most and then order the fixes in a way that makes sense.
Many golfers try random tips from friends or videos. They might try swinging more to the right without first changing a weak grip, so the face stays open and the ball still curves.
This approach is different because it follows a logical order:
The loop drill also gives a strong opposite feel to the old over‑the‑top motion, which helps your brain build a new habit. It is normal for old patterns to feel comfortable at first, so patience is important.
At Elite Golf Academies, we add objective TrackMan and video feedback plus support from PGA coaches, which keeps you on track even when the new motion feels strange.
For the first few weeks, the best place to work on how to fix a golf slice is the driving range or a lesson bay where you can focus fully on the drills:
Once you see more straight shots or small draws on the range, start taking the new feels onto the course. A useful step is to play a practice round where score does not matter and your only goal is to make the new motion on each swing.
At Elite Golf Academies, our indoor simulators let you see ball flight on a virtual course while still having all your swing data visible. Over time, you can keep using these drills as part of your warm‑up before rounds to stop the slice from creeping back.